How to go from this:
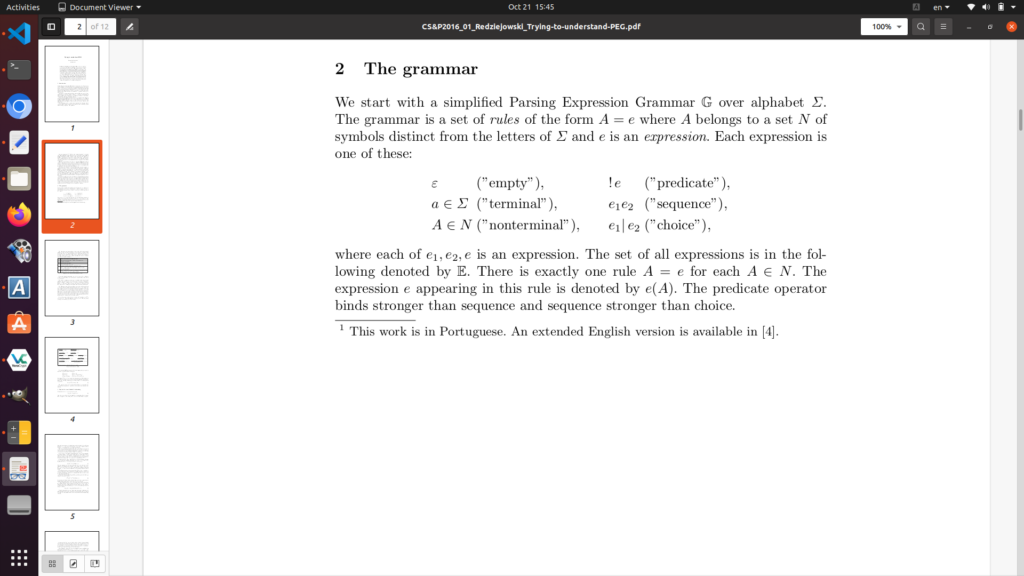
to
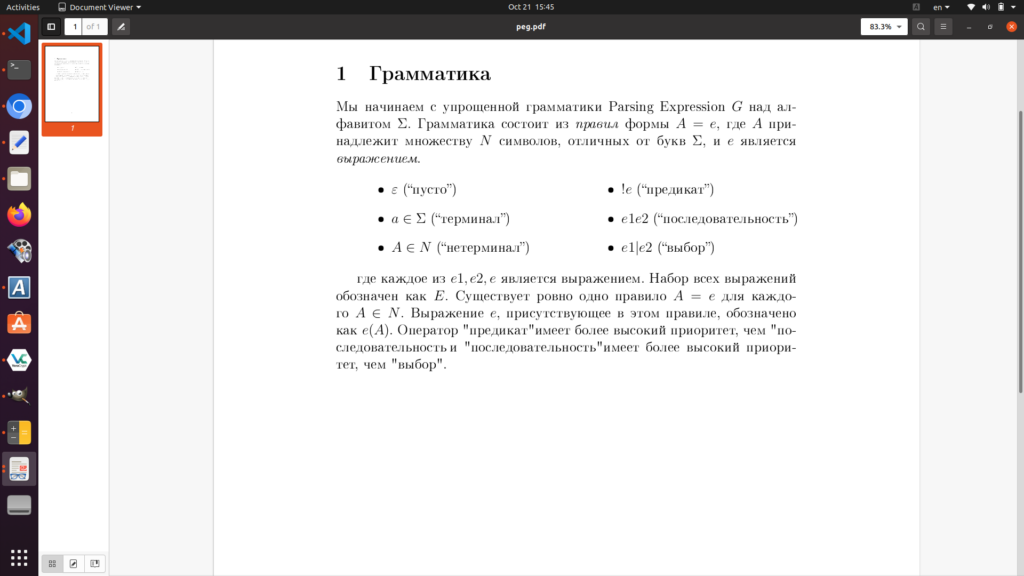
in a few steps using ChatGPT4.0?
- make a screenshot of article page
- send it to the ChatGPT4.0 with request to translate to Russian and convert to LaTex code preserving original layout
- Ask ChatGPT4.0 to explain how you can covert this code to pdf on you system (Windows, Ubuntu, MacOS, etc)
- Follow the given instructions
- Enjoy the results!